
Mastering sourdough has never been easier with this foolproof guide to creating your own starter. In just a few days, you’ll nurture a bubbly, tangy culture that transforms simple ingredients into golden, crusty loaves.
The process is as rewarding as the result, filling your kitchen with the warm, yeasty aroma of freshly baked bread. With minimal effort and a little patience, you’ll unlock the secret to artisanal sourdough that’s crisp on the outside and tender within.
This guide ensures your starter thrives, yielding bread with a perfect balance of chewy texture and complex flavor. Whether you’re a novice or a seasoned baker, the journey from starter to loaf is a delicious adventure.
In just a week, you’ll be pulling crusty, airy sourdough from the oven, ready to savor every bite. Let’s make baking magic happen—one bubbly starter at a time.
Ingredients for Your Sourdough Starter
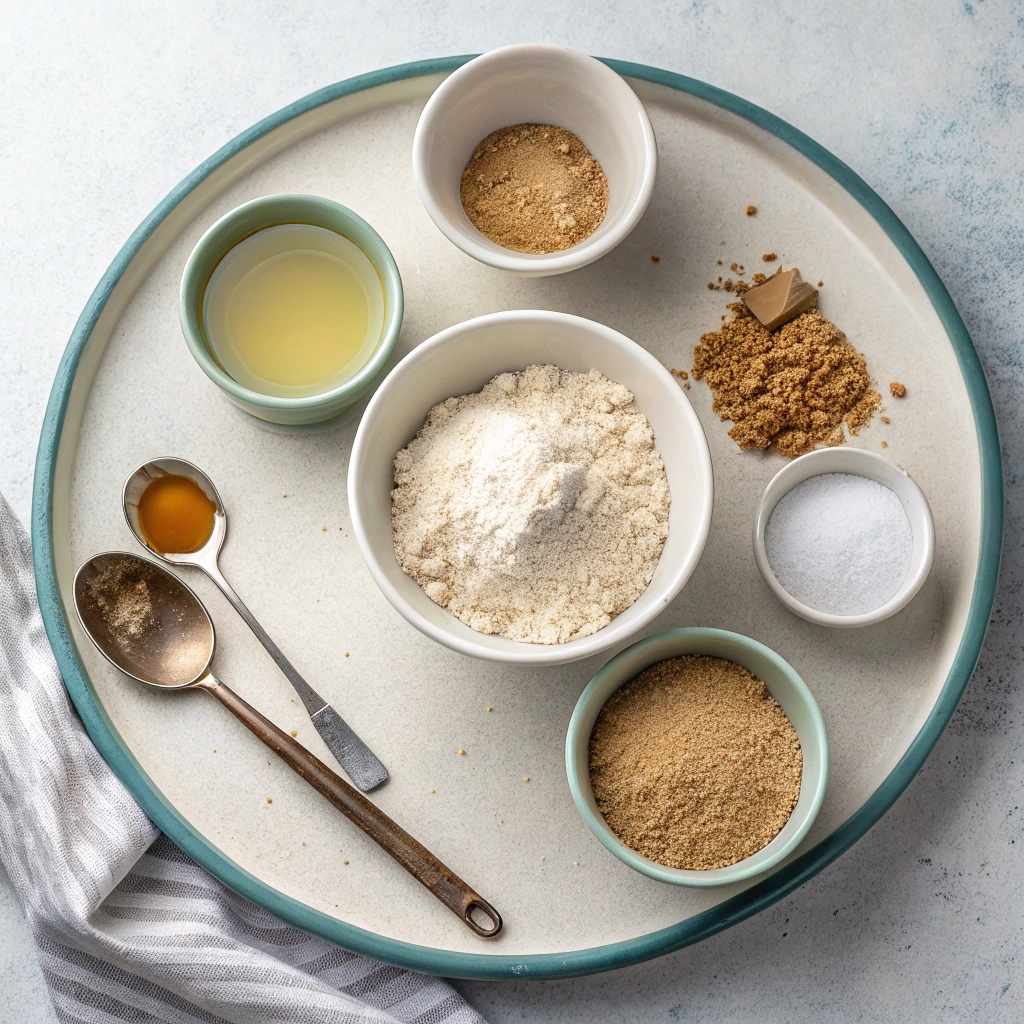
- 1/2 cup (2oz/60g) whole wheat flour (see Recipe Notes for gluten-free options)
- 1/4 cup + 2 tablespoons (3oz/86g) water (tap water works fine)
To Feed Your Starter:
- 1/2 cup (2oz/60g) unbleached all-purpose flour
- 1/4 cup + 1 tablespoon (2oz/60g) water
Step-by-Step Instructions for Your Sourdough Starter
- Day 1: Making Your Sourdough Starter
- Combine 1/2 cup (2oz/60g) whole wheat flour and 1/4 cup + 2 tablespoons (3oz/86g) water in a large sealable glass jar.
- Mix with a fork until smooth; the consistency will be thick and pasty.
- Cover loosely with plastic wrap or a small cloth, and let it rest in a warm spot for 24 hours.
- Tip: Use an electric scale for precision.
- Day 2: Look for Bubbles
- Check for bubbles on the surface. If none are visible, don’t worry—they may have dissolved overnight.
- Let the starter rest in your warm spot for another 24 hours.
- Day 3: Feed Your Starter
- Remove and discard approximately half of the starter.
- Feed it with 1/2 cup (2oz/60g) all-purpose flour and 1/4 cup + 1 tablespoon (2oz/60g) water.
- Mix until smooth. The texture should resemble thick batter or yogurt. Add more water if needed.
- Cover loosely and let rest in your warm spot for another 24 hours.
- Days 4, 5 & 6: Keep on Feeding!
- Repeat the feeding process from Day 3: discard half the starter and feed it with 1/2 cup (2oz/60g) all-purpose flour and 1/4 cup + 1 tablespoon (2oz/60g) water.
- As the yeast develops, the starter will rise and bubble. When it falls, it’s time to feed again.
- Tip: Use a rubber band or masking tape to measure growth.
- Day 7: A Sourdough Starter is Born!
- Your starter should have doubled in size, with plenty of bubbles and a spongy, fluffy texture.
- It should smell boozy but not unpleasant.
- Float Test: Drop a teaspoon of starter in water. If it floats, it’s ready to use!
- If not ready, continue feeding for 1-2 weeks or more.
- Storage and Ongoing Care
- Room Temperature: Feed daily if baking often (ideal temp: 78°F/25°C to 82°F/26°C).
- Refrigerator: Store if baking occasionally; feed once a week.
- When ready to bake, bring to room temperature and feed 1-2 times daily for 1-3 days until active.
- Missed a Feeding? Don’t panic! Remove any dark liquid (“hooch”) and feed to revive.
Gluten-Free Sourdough Starter? Yes, It’s Possible!
If you’re avoiding gluten, you can still make a sourdough starter! Simply swap the whole wheat and all-purpose flour for gluten-free alternatives like brown rice flour or a gluten-free flour blend. Keep in mind that gluten-free starters may behave slightly differently, so be patient and adjust water amounts as needed to achieve a thick, batter-like consistency.
How to Store Your Sourdough Starter Like a Pro
Not ready to bake yet? No problem! Store your starter in the fridge in a clean, sealable jar. Feed it once a week to keep it alive. When you’re ready to bake, bring it back to room temperature and feed it 1-2 times daily for 1-3 days until it’s active and bubbly again. This method is perfect for occasional bakers!
What to Do If Your Starter Smells Funky
If your starter develops a stinky smell or a dark liquid (called “hooch”), don’t panic! This just means it’s hungry. Pour off the hooch, discard half the starter, and feed it as usual. After a couple of feedings, it should perk right back up. Remember, sourdough starters are resilient!
Time-Saving Tips for Busy Bakers
Short on time? Store your starter in the fridge to reduce daily feedings. When you’re ready to bake, plan ahead by taking it out 1-3 days in advance to revive it. You can also double the feeding amounts to create extra starter for recipes, saving you time in the long run.
Essential Tools for Sourdough Success
Invest in a few key tools to make sourdough easier: an electric scale for precise measurements, a large glass jar for easy monitoring, and a rubber band or masking tape to track your starter’s growth. These small tools can make a big difference in your sourdough journey!
The Last Sourdough Starter Guide You’ll Ever Need
Ingredients
To Feed Your Starter You Need:
- 1/2 cup whole wheat flour* see Recipe Notes for GLUTEN FREE options
- 1/4 cup +2 tablespoons water I used tap
- 1/2 cup unbleached all-purpose flour
- 1/4 cup +1 tablespoon water
Instructions
- Day 1: Making your Sourdough Starter Combine 1/2 cup (2oz/60g) of whole wheat flour and 1/4 cup +2 tablespoons (3oz/86g) of water in a large sealable glass jar. Mix with a fork until smooth; the consistency will be thick and pasty. Cover loosely with plastic wrap or small cloth, and let it rest in a warm spot, for 24 hours.
- *Tip: I recommend using an electric scale when making and working with sourdough as precision is important.
- Day 2: Look for BubblesCheck to see if any bubbles have appeared on the surface. If you don’t see anything, it’s okay. The bubbles might have appeared and dissolved overnight while you were sleeping. You don’t have to do anything else now. Rest the starter in your warm spot for another 24 hours.
- Day 3: Feed Your StarterRemove and discard approximately half of your starter from the jar. I did this by eyeballing it each time and it worked just fine. The texture will be stretchy and bubbly.Feed it with a 1/2 cup (2oz/60g) of all-purpose flour and 1/4 cup +1 tablespoon (2oz/60g) of water in the jar. Mix with a fork until smooth. The texture should resemble thick-ish batter or yogurt at this point, so add more water if needed. Cover loosely, and let rest in your warm spot for another 24 hours.
- Days 4, 5 & 6: Keep on Feeding!Repeat the feeding process outlined on Day 3 (remove and discard half of the starter, and feed it with 1/2 cup (2oz/60g) of all-purpose flour and 1/4 cup +1 tablespoon (2oz/60g) of water. As the yeast begins to develop, your starter will rise, and bubbles will form on the surface and throughout the culture. When the starter falls, it’s time to feed it again.
- *Tip: Place a rubber band or piece of masking tape around the jar to measure the starter’s growth as it rises.
- Day 7: A Sourdough Starter is Born!By now, your starter should have doubled in size. You should see plenty of bubbles, both large and small. The texture will be spongy and fluffy. It should smell boozy, but not like stinky like gym socks. Your starter is now active and ready to use!
- Is Your Starter Ready to Use?Do the float test: Drop a teaspoon of bubbly starter in a jar of water; if it floats to the top you can use it.
- Please keep in mind, if your starter is not ready at this point which is quite common due to temperature issues, timing, and other factors, it is totally fine to continue the feeding process for 1-2 weeks or more. The flavor and texture will just get better with time.
- I’m not ready to use my starter yet, what do I do?If you are not ready to use your starter that is no problem at all. Simply transfer it to a clean sealable jar and keep it in the fridge to use later. Once in the fridge, you only need to feed your starter once every 7 days. See ‘Storage Options’ below.
- Starter Storage OptionsIf you bake often, store your starter at room temperature (ideally between 78°F/25°C and 82°F/26°C) feeding it once a day to keep it active. If you plan to bake only once in a while, store it in the fridge to preserve its strength and feed it once a week. When ready to bake, store it at room temperature and feed it once/twice a day for 1-3 days or until it can predictably and reliably reach its peak.
- How to Feed Your Sourdough Starter for Ongoing CareBegin by removing and discarding about half of your starter.Replenish what’s left in the jar with fresh flour (use all unbleached purpose flour) and water.Cover loosely, and let it rise at room temperature until bubbly and double in size. Once it falls, the bubbles will become frothy and eventually disappear. Then you’ll know it’s time to feed your starter again.Feed your starter everyday if it’s stored at room temperature. Feed it 1x a week if you keep it in the fridge.
- What happens if I miss a feeding?If you miss a feeding, don’t worry — your starter is not going to die. It might look ugly (and smell horrendous) but it usually just needs a few feedings to perk back up. If you haven’t fed in some time you might see a dark liquid might appear on the surface and throughout the culture. It has a very stinky smell, similar to rubbing alcohol or gym socks. This liquid is called “hooch” and is an indication that your starter needs to be fed. Any time you see this liquid, it’s best to remove it along with any discolored starter present.