

Stabilized whipped cream is the secret to desserts that stay picture-perfect for hours. With just a few simple ingredients, you can create a luxuriously smooth topping that holds its shape beautifully, even in warm weather. The addition of gelatin or cornstarch ensures it stays light and airy without deflating, making it ideal for cakes, pies, or even hot cocoa. In just 10 minutes of prep and a 2-hour chill, you’ll have a versatile treat that’s as elegant as it is delicious.
This whipped cream isn’t just stable—it’s a flavorful canvas for your creativity. Add a hint of vanilla, a dash of cocoa, or a splash of citrus to customize it to your taste. Its silky texture melts on the tongue, leaving behind a rich, creamy finish that elevates any dessert. Whether you’re hosting a party or indulging in a quiet treat, this recipe ensures your whipped cream stays perfectly fluffy and ready to impress.
Ingredients for Stabilized Whipped Cream
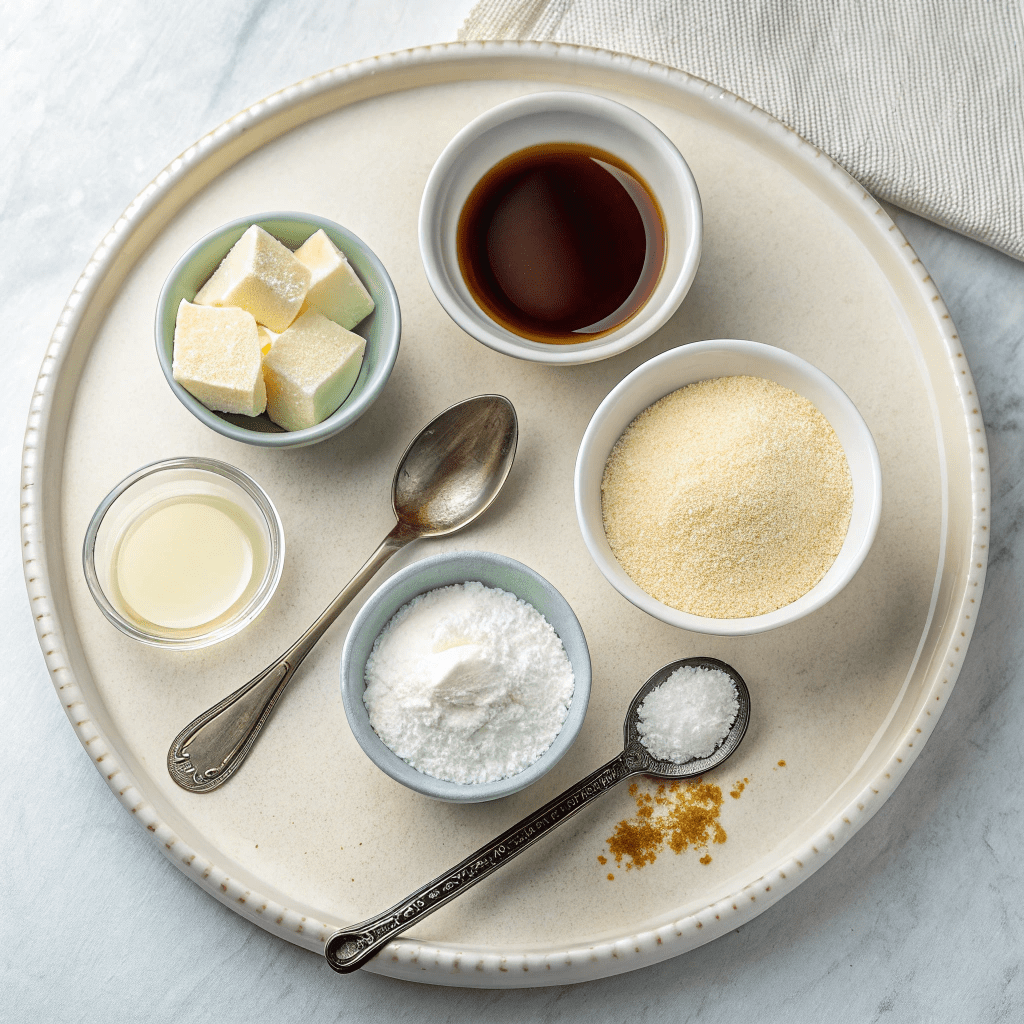
- 1 tablespoon boiling water (for dissolving gelatin)
- 1 teaspoon powdered gelatin (unflavored; ensures stability)
- 1 cup (8 fl oz/240 ml) heavy whipping cream (cold, for best results)
- 2 tablespoons granulated sugar (adjust to taste; powdered sugar can be substituted)
- 1 teaspoon vanilla extract (or substitute with other flavorings like almond extract)
Step-by-Step Instructions
- Prepare the gelatin: In a small, heat-proof measuring cup, combine the boiling water and powdered gelatin. Stir until fully dissolved, then let it sit for 5 minutes to sponge and set like jelly.
- Liquefy the gelatin: Place the cup in a pan of simmering water and stir until the gelatin becomes liquid again. Alternatively, microwave it for 20 seconds. Set aside to cool to room temperature (about 5 minutes), ensuring it remains liquid.
- Whip the cream: In a medium bowl, combine the heavy whipping cream, sugar, and vanilla extract. Using an electric mixer, whip until soft peaks form.
- Add the gelatin: Slowly drizzle the cooled gelatin mixture into the whipped cream while continuing to whip. Whip until stiff peaks form.
- Chill and set: Cover the whipped cream and refrigerate for 2 hours to firm up. It’s now ready to use or can be stored in the fridge for up to 3 days. Use it to decorate or fill cakes, cupcakes, or desserts.
Perfect Pairings: Serving Suggestions for Stabilized Whipped Cream
This stabilized whipped cream is a versatile topping that pairs beautifully with a variety of desserts. Try it on fresh fruit salads, hot cocoa, or warm pies like pumpkin or apple. It’s also perfect for layering in parfaits or as a filling for cupcakes and cream puffs. For a show-stopping dessert, use it to frost a chocolate cake or cheesecake.
Storage Tips: Keeping Your Whipped Cream Fresh
Once prepared, this whipped cream can be stored in an airtight container in the fridge for up to 3 days. If it softens slightly, simply give it a quick whip with a hand mixer to restore its fluffy texture. Avoid freezing, as it can alter the texture and cause separation.
Recipe Variations: Customize Your Whipped Cream
Feel free to experiment with flavors! Swap the vanilla extract for almond extract or add a teaspoon of cocoa powder for a chocolate twist. For a festive touch, mix in a pinch of cinnamon or nutmeg. You can also adjust the sweetness by reducing or increasing the sugar to suit your taste.
Time-Saving Tips: Streamline the Process
To save time, prepare the gelatin mixture while the cream is chilling in the fridge. If you’re in a hurry, you can skip the 2-hour chilling step and use the whipped cream immediately, though it will be slightly softer. For best results, though, patience pays off!
Equipment Guidance: Tools for Success
For this recipe, you’ll need a heat-proof measuring cup for the gelatin mixture, a medium mixing bowl, and an electric mixer (hand or stand). A fine-mesh sieve can help ensure the gelatin dissolves smoothly. If you’re microwaving the gelatin, use a microwave-safe container and stir well to avoid lumps.

How To Make Stabilized Whipped Cream
Ingredients
- 1 tablespoon boiling water
- 1 teaspoon powdered gelatin
- 1 cup heavy whipping cream (8floz/240ml)
- 2 tablespoons granulated sugar
- 1 teaspoon vanilla extract
Instructions
- Combine the boiling water with the gelatin in a small, heat-proof measuring cup. stir to dissolve and let sit for 5 minutes to sponge and set like jelly.
- Once set, you need to make the mixture liquid again so place the cup in a pan of simmering water and stir until dissolved. You can also microwave it for a roughly 20 seconds.
- Set aside and let cool to room temperature but still liquid (about 5 minutes).
- Next combine the cream with the sugar and vanilla in a medium bowl and with an electric mixer, whip until soft peaks.
- Slowly drizzle in the cooled, gelatin mixture and whip until stiff peaks form.
- Cover and refrigerate to chill and firm up for roughly 2 hours. It is now ready to use or can be kept in the fridge for up to 3 days. Use to decorate and fill cakes with.

