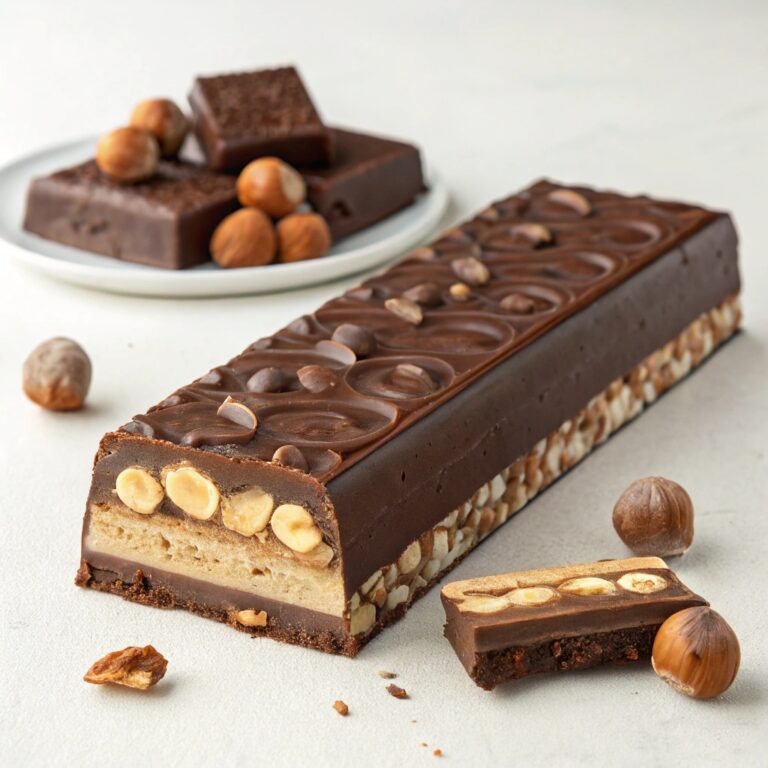
Indulge in the luxurious blend of Rich Chocolate & Hazelnut Torrone, a treat that combines velvety chocolate with crunchy hazelnuts in every bite. This no-bake delight is surprisingly simple to prepare, requiring just 45 minutes of hands-on time before it sets to perfection. The smooth, creamy texture of the chocolate pairs beautifully with the nutty crunch, creating a symphony of flavors that’s both decadent and satisfying. Perfect for gifting or savoring yourself, this torrone is a crowd-pleaser that feels effortlessly elegant.
After a quick chill in the fridge for 3 hours, you’ll be rewarded with a dessert that’s rich, indulgent, and utterly irresistible. The deep cocoa notes mingle with the toasted hazelnuts, offering a balance of sweetness and depth that’s hard to resist. Whether you’re hosting a gathering or treating yourself, this torrone is a guaranteed way to elevate any moment. Its simplicity and sophistication make it a standout recipe you’ll return to time and time again.
Ingredients for Rich Chocolate & Hazelnut Torrone

- 1 ½ cups (9oz/260g) chopped bittersweet chocolate, divided (use high-quality chocolate for best results)
- 1 cup (6oz/170g) milk chocolate, roughly chopped
- 2 cups (12oz/340g) white chocolate, roughly chopped
- 1 ¾ cups (14oz/400g) Nutella or any hazelnut spread
- 2 ¼ cups (11oz/320g) toasted hazelnuts (toast them yourself for extra flavor)
Step-by-Step Instructions
- Prepare the chocolate shell: Melt 1 cup (7oz/200g) of bittersweet chocolate using a double boiler or microwave. Pour ½ (3 ½oz/100g) of the melted chocolate into a 9×5″ loaf pan, coating the bottom and sides. Refrigerate for 20 minutes to set. Repeat with the remaining ½ (3 ½oz/100g) of melted chocolate and refrigerate again.
- Make the hazelnut filling: Melt the milk chocolate, white chocolate, and Nutella using the same method. Once melted, stir in the toasted hazelnuts. Let the mixture cool for 20 minutes.
- Assemble the torrone: Pour the cooled hazelnut filling into the chocolate-coated pan. Spread evenly and tap the pan gently on the counter to remove air bubbles. Refrigerate for 1 hour.
- Add the final chocolate layer: Melt the remaining ⅓ cup (2oz/60g) of bittersweet chocolate and pour it over the filling. Refrigerate for 2 hours or until fully set.
- Serve and store: Let the torrone stand at room temperature for 1 hour before slicing. Store in the fridge for up to 7 days.
Perfect Pairings: Serving Suggestions
This Rich Chocolate & Hazelnut Torrone is a showstopper on its own, but it pairs beautifully with a cup of espresso or a glass of dessert wine like Moscato. For a festive touch, serve it alongside fresh berries or a dollop of whipped cream. It’s also a great addition to a dessert platter with cookies and truffles.
Storage Secrets: Keeping Your Torrone Fresh
Store your torrone in an airtight container in the fridge for up to 7 days. If you’d like to keep it longer, wrap it tightly in plastic wrap and freeze for up to 2 months. Let it thaw in the fridge overnight before serving. Avoid leaving it at room temperature for too long, as it can soften and lose its shape.
Time-Saving Tips for Busy Bakers
To speed up the process, use pre-chopped chocolate or a food processor to chop it quickly. You can also toast the hazelnuts in advance and store them in an airtight container. If you’re short on time, reduce the chilling periods slightly, but make sure each layer is firm before adding the next.
Recipe Variations: Get Creative!
Swap out the hazelnuts for almonds or pistachios for a different flavor profile. You can also experiment with other spreads like peanut butter or caramel instead of Nutella. For a festive twist, add a sprinkle of sea salt or a dash of cinnamon to the filling.
Equipment Essentials: Tools You’ll Need
Make sure you have a 9 x 5-inch loaf pan and parchment paper for easy removal. A heat-safe bowl and a double boiler (or microwave) are essential for melting the chocolate. A silicone spatula will help spread the layers evenly, and a sharp knife is key for clean slicing.

Rich Chocolate & Hazelnut Torrone
Ingredients
- 1 ½ cups chopped bittersweet chocolate divided
- 1 cup milk chocolate roughly chopped
- 2 cups white chocolate roughly chopped
- 1 ¾ Nutella (or any hazelnut spread)
- 2 ¼ cups toasted hazelnuts
Instructions
- In a heat-safe bowl melt over 1 cup (7oz/200g) bittersweet chocolate either over a ban Marie or gently in the microwave.
- Pour roughly ½ (3 ½oz/100g) of the melted chocolate on the sides and the bottom of a 9 x 5 ” loaf pan, forming the outer shell of the torrone.
- Refrigerate for 20 minutes to set.
- Remove the loaf pan from the fridge and repeat the process again swirling around the remaining ½ (3 ½oz/100g) of melted bittersweet chocolate.
- Place back in the fridge to set.
- Melt the milk chocolate, white chocolate, and Nutella the same way as above.
- When completely melted, add in the toasted hazelnuts and stir.
- Set aside to cool down for 20 minutes before moving on to the next step.
- Once cooled, pour the hazelnut filling into the pan coated with dark chocolate and spread the mixture evenly.
- Gently tap the loaf pan on the counter to release any air bubbles.
- Refrigerate for about 1 hour.
- Take the remaining ⅓ cup (2oz/60g) of bittersweet chocolate, melt it, and then pour it over the cooled filling.
- Refrigerate your chocolate hazelnut torrone for about 2 hours or until fully set.
- Let it stand at room temperature for an hour before slicing and enjoying.
- Store torrone in the fridge for up to 7 days.


