
There’s something irresistible about the perfect balance of crunchy oats and rich chocolate in Homemade Chocolate Hobnobs. These treats are a dream for anyone who loves a satisfying bite with a melt-in-your-mouth chocolate finish.
With just 5 minutes of prep and 45 minutes of baking, you’ll have a batch of golden, crumbly biscuits that are far superior to store-bought. The aroma of toasted oats and warm chocolate will fill your kitchen, promising a treat that’s as comforting as it is indulgent.
Each bite delivers a delightful contrast of textures—crisp edges with a slightly chewy center, all coated in a smooth, decadent chocolate layer. These hobnobs are perfect for dunking in tea or enjoying on their own, offering a homemade touch that’s both nostalgic and luxurious.
Whether you’re baking for yourself or sharing with friends, this recipe is a surefire way to bring joy to any moment. In under an hour, you’ll have a batch of biscuits that feel like a warm hug in every bite.
What You’ll Need for Homemade Chocolate Hobnobs
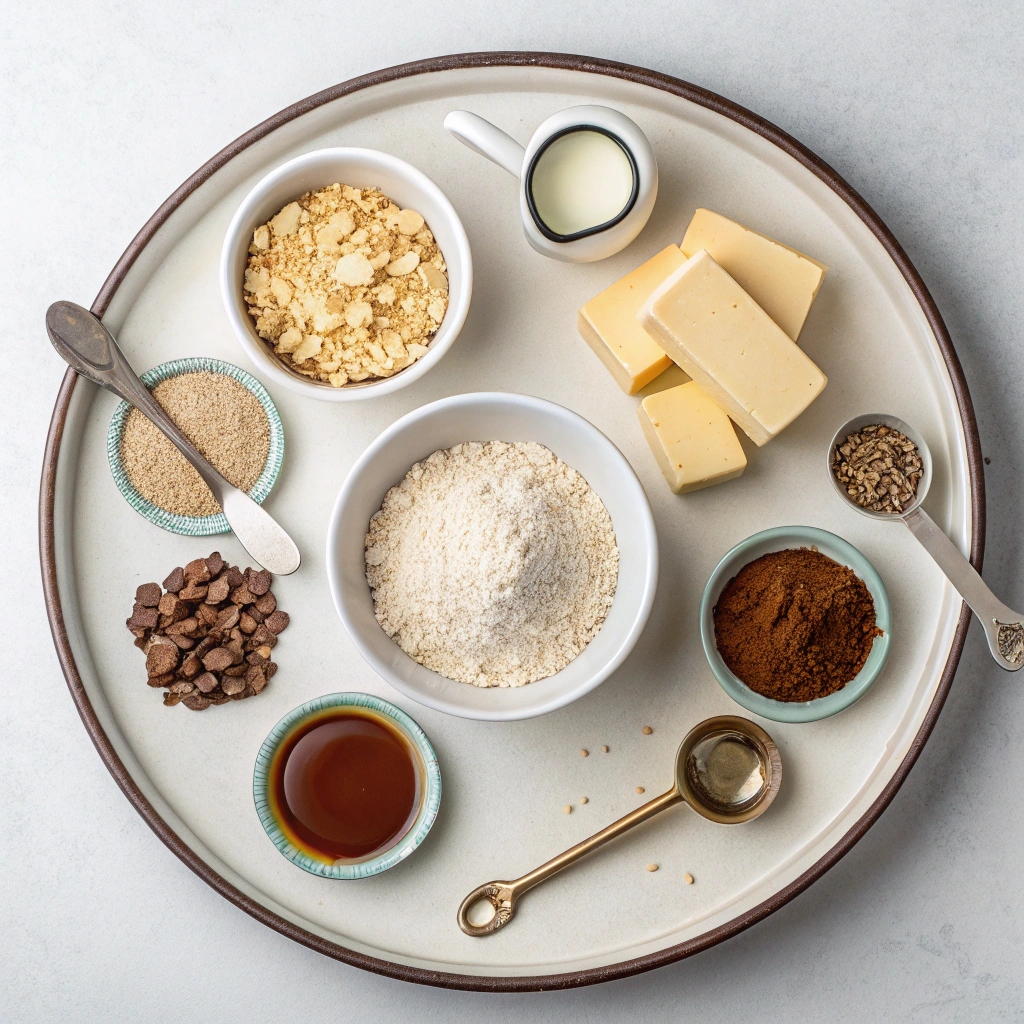
- 8 ½ tablespoons (125g / 4oz) unsalted butter (softened for easier mixing)
- ⅓ cup (80g / 3 oz) brown sugar (light or dark, depending on your preference)
- 2 tablespoons golden syrup (or substitute with honey or corn syrup)
- ⅔ cup (100g / 3½ oz) porridge oats (use rolled oats for a chewier texture)
- ⅔ cup (100g / 3½ oz) wholemeal flour (or substitute with all-purpose flour)
- ½ teaspoon baking soda
- ½ teaspoon baking powder
- ½ – 1 teaspoon sea salt (adjust to taste)
- ⅔ cup (100g) chocolate (dark, milk, or semi-sweet, depending on your preference)
- 2 tablespoons (30g / 1 oz) unsalted butter (for melting with the chocolate)
How to Make Homemade Chocolate Hobnobs
- Preheat the oven to 350°F / 180°C and line a few baking trays with parchment paper.
- In a mixing bowl, cream the butter and brown sugar using a hand or stand mixer until pale, fluffy, and smooth.
- Add the golden syrup and beat until fully incorporated.
- On a low speed, mix in the oats, flour, baking soda, baking powder, and salt until evenly combined.
- Bring the dough together into a ball, wrap it in cling wrap, and refrigerate for 15-20 minutes to firm up.
- Roll the dough into small balls (about the size of a tablespoon) and flatten them on the trays until they are about 2 inches in diameter. Leave space between the cookies for spreading.
- Bake for 10-12 minutes, or until golden brown. Allow the cookies to cool on the trays.
- In a heatproof bowl, melt the chocolate and butter together over a pot of simmering water or in the microwave, stirring until smooth.
- Spoon a teaspoon of chocolate onto the top of each cookie and spread it evenly using the back of a spoon.
- Once the chocolate has slightly set, swirl your spoon across the chocolate in a figure-eight pattern to create the classic hobnob look.
- Allow the chocolate to set completely before enjoying or dunking into your favorite tea!
Perfect Pairings: Serving Suggestions
Homemade Chocolate Hobnobs are a classic treat that pairs perfectly with a cup of tea or coffee. For an extra indulgent twist, serve them with a glass of cold milk or a scoop of vanilla ice cream. They also make a great addition to a dessert platter alongside other biscuits and sweet treats.
Keep Them Fresh: Storage Tips
Store your Hobnobs in an airtight container at room temperature for up to 5 days. If you want to keep them longer, you can freeze them for up to 3 months. Just place them in a freezer-safe bag or container, and thaw at room temperature when ready to enjoy.
Mix It Up: Recipe Variations
Feel free to get creative with your Hobnobs! Try adding a handful of chopped nuts or dried fruit to the dough for extra texture. You can also experiment with different types of chocolate, like dark or white, for the topping. For a festive touch, sprinkle some crushed candy canes or edible glitter on the chocolate before it sets.
Quick Tips: Time-Saving Hacks
To save time, you can skip the refrigeration step if you’re in a hurry, though the dough may spread a bit more. If you’re short on time for melting chocolate, use chocolate chips and melt them directly in the microwave in 20-second intervals, stirring in between, until smooth.
Essential Tools: Equipment Guidance
For this recipe, a hand or stand mixer will make creaming the butter and sugar a breeze. A rolling pin can help flatten the dough balls evenly, and a silicone spatula is perfect for spreading the melted chocolate. If you don’t have parchment paper, a silicone baking mat works just as well.
Homemade Chocolate Hobnobs
Ingredients
- 8 ½ tablespoons unsalted butter 125g / 4oz
- ⅓ cup brown sugar 80g / 3 oz
- 2 tablespoons golden syrup
- ⅔ cup porridge oats 100g / 3½ oz
- ⅔ cup wholemeal flour 100g / 3½ oz
- ½ teaspoon baking soda
- ½ teaspoon baking powder
- ½ – 1 teaspoon sea salt to taste
- ⅔ cup chocolate 100g
- 2 tablespoons unsalted butter 30g / 1 oz
Instructions
- Preheat the oven to 350 F /180 C and line a few trays with parchment paper.
- With a hand or stand mixer cream the butter and the brown sugar until pale, fluffy and smooth.
- Add the golden syrup and beat until it’s incorporated.
- On a low speed, mix in the oats, flour, baking soda, baking powder and salt.
- Once the dry and wet ingredients are evenly combined bring the dough together into a ball, wrap with cling wrap and refrigerate for 15-20 minutes.
- Roll the dough into small balls about the size of a tablespoon and flatten on the tray until they are about 2 inches in diameter. Be sure to leave a bit of room between the cookies for spreading.
- Bake for 10-12 minutes, until golden brown, then allow to cool on the trays.
- Melt the chocolate and butter together in a heatproof bowl set over a pot of simmering water or in the microwave.
- Spoon a teaspoon of chocolate onto the top of each cookie and spread out evenly using the back of a spoon.
- Once the chocolate has slightly set swirl your spoon across the chocolate working your way down the cookie in the shape of a figure eight. This will create that beautiful classic hobnob look!
- Allow to set before enjoying/dunking into tea.