
There’s something magical about the crisp, chocolatey perfection of homemade Thin Mints. These delightful treats combine a smooth, rich coating with a satisfyingly crunchy base, creating a balance of textures that’s simply irresistible.
With just 30 minutes of prep and a couple of hours to set, you’ll have a batch of cookies that rival the classic favorite. The cool, refreshing hint of mint paired with the deep cocoa flavor makes every bite a nostalgic yet elevated experience. Perfect for sharing or savoring solo, these cookies are a testament to how simple ingredients can create something extraordinary.
Making your own Thin Mints allows you to enjoy their fresh, vibrant flavors straight from your kitchen. The process is surprisingly easy, and the result is a treat that’s both indulgent and satisfying. Whether you’re a fan of the original or new to the mint-chocolate combo, these cookies are sure to become a staple in your dessert repertoire.
Plus, the aroma of chocolate and mint wafting through your home is an added bonus. In just a few hours, you’ll have a batch of cookies that are as fun to make as they are to eat.
Ingredients for Homemade Thin Mints
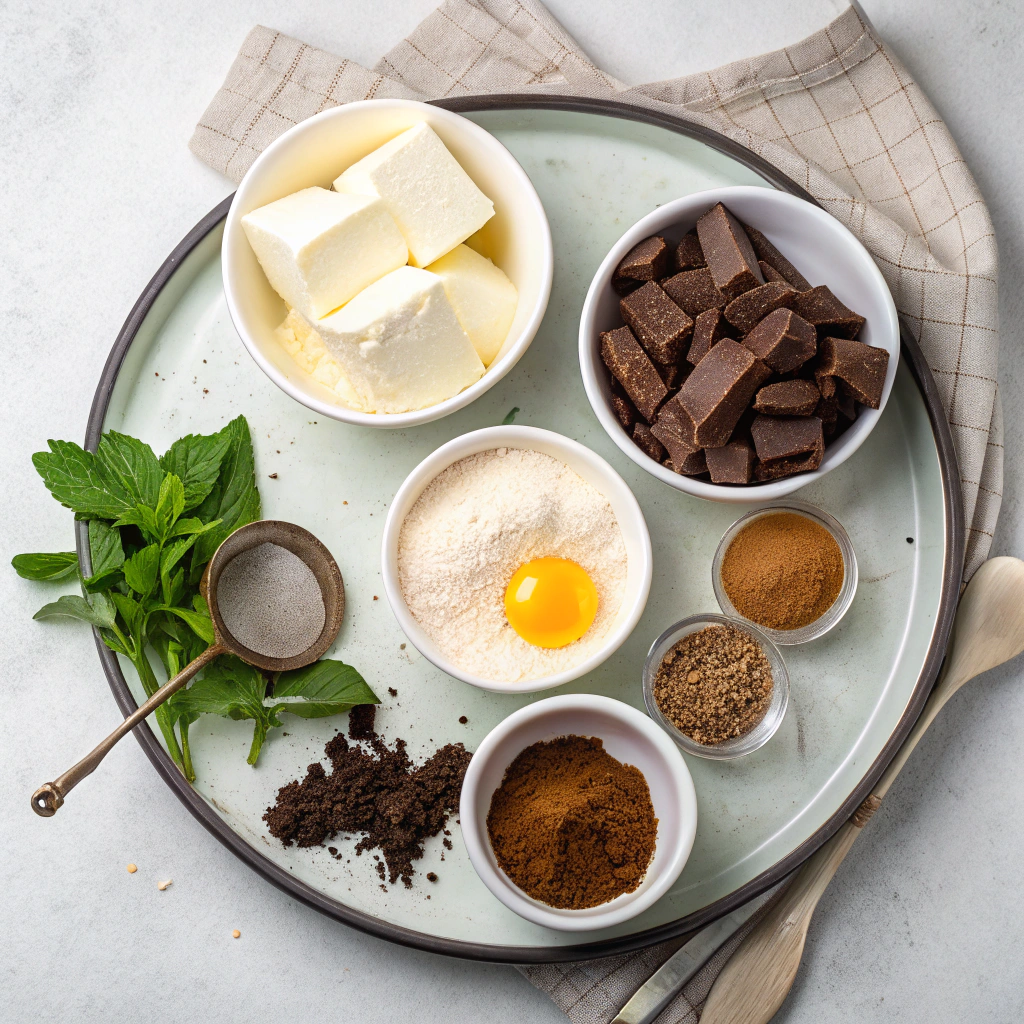
- Dough:
- 1 cup (8 oz/225 g) butter, softened
- ⅔ cup (5 oz/142 g) granulated sugar
- 1 large egg white, at room temperature
- 1 teaspoon vanilla extract
- ½ teaspoon peppermint extract
- 2 cups (10 oz/284 g) all-purpose flour
- ½ cup (2 oz/57 g) cocoa powder
- ½ teaspoon salt
- Chocolate Coating:
- 2 ⅔ cups (16 oz/450 g) semisweet chocolate, finely chopped
- 1 ½ teaspoons peppermint extract
- ½ teaspoon vanilla extract
- ¼ teaspoon neutral-flavored vegetable oil (e.g., canola or grapeseed)
Step-by-Step Instructions
- Make the Dough: In a stand mixer or medium bowl with an electric mixer, beat the butter and sugar on medium speed until fluffy, about 3 minutes. Add the egg white, vanilla extract, and peppermint extract, and beat until combined.
- In a small bowl, whisk together the flour, cocoa powder, and salt. With the mixer on low, gradually mix the flour mixture into the butter mixture until a dough forms.
- Shape the dough into a flattened disc, wrap it well in plastic wrap, and refrigerate until firm, about 2 hours.
- Bake the Cookies: Preheat the oven to 350°F (180°C) and line two baking sheets with parchment paper. On a floured surface, roll the dough to ⅛-inch (3 mm) thickness. Use a 2-inch (5 cm) round cutter to cut out cookies, rerolling scraps as needed. Place cookies 1½ inches (3 cm) apart on the prepared sheets.
- Bake for 15–18 minutes, until the cookies look dry and baked. Transfer to a wire rack to cool completely. Keep the parchment-lined baking sheets for the next step.
- Make the Chocolate Coating: In a double boiler or microwave-safe bowl, combine the chocolate, peppermint extract, vanilla extract, and vegetable oil. Heat gently, stirring frequently, until melted and smooth.
- Using a fork, dip each cookie into the chocolate coating, ensuring it’s fully coated. Lift out, let excess chocolate drip off, and place back on the baking sheets. Allow the coating to set completely (you can speed this up by refrigerating them).
- Store the cookies in an airtight container at room temperature for up to 3 days. Enjoy your homemade thin mints!
Perfect Pairings: Serving Suggestions
These Homemade Thin Mints are a delightful treat on their own, but they pair wonderfully with a glass of cold milk or a cup of hot cocoa. For a fun twist, crumble them over vanilla ice cream or use them as a garnish for a minty milkshake. They also make a great addition to a dessert platter alongside other cookies or chocolates.
Storage Secrets: Keeping Them Fresh
Store your Thin Mints in an airtight container at room temperature for up to 3 days. If you want to keep them longer, pop them in the fridge for up to a week or freeze them for up to 3 months. Just make sure to layer them with parchment paper to prevent sticking. When ready to enjoy, let them come to room temperature for the best texture.
Time-Saving Tips for Busy Bakers
Short on time? You can skip the rolling and cutting by shaping the dough into a log, chilling it, and then slicing it into rounds. This method saves time and still gives you perfectly round cookies. Additionally, you can melt the chocolate coating in the microwave in 30-second intervals, stirring in between, for a quicker process.
Recipe Variations: Get Creative
Feel free to experiment with different flavors! Swap the peppermint extract for orange or almond extract for a unique twist. You can also use dark or white chocolate for the coating instead of semisweet. For a festive touch, sprinkle crushed candy canes or edible glitter on the chocolate coating before it sets.
Equipment Guidance: Tools You’ll Need
To make this recipe a breeze, ensure you have a stand mixer or electric hand mixer for creaming the butter and sugar. A rolling pin and 2-inch round cutter are essential for shaping the cookies. For the chocolate coating, a double boiler or microwave-safe bowl works perfectly. Don’t forget parchment-lined baking sheets and a wire rack for cooling!
Homemade Thin Mints
Ingredients
Dough
- 1 cup butter (softened) 8 oz/225 g
- ⅔ cup granulated sugar 5 oz/142 g
- 1 large egg white (at room temperature)
- 1 teaspoon vanilla extract
- ½ teaspoon peppermint extract
- 2 cups all-purpose flour 10 oz/284 g
- ½ cup cocoa powder 2 oz/57 g
- ½ teaspoon salt
Chocolate Coating
- 2 ⅔ cups semisweet chocolate (finely chopped) 16 oz/450 g
- 1 ½ teaspoons peppermint extract
- ½ teaspoon vanilla extract
- ¼ teaspoon neutral-flavored vegetable oil
Instructions
- In the bowl of a stand mixer or in a medium bowl with an electric mixer, beat the butter and sugar together on medium speed until fluffy, about 3 minutes. Add in the egg white, vanilla extract, and peppermint extract and beat until combined.
- In a small bowl, whisk the flour, cocoa powder, and salt together.
- With the mixer on low, mix the flour mixture into the butter mixture until a dough is formed. Shape the dough into a flattened disc, then wrap well and refrigerate until firm, about 2 hours.
- When ready to bake, preheat the oven to 350°F (180°C) and line two baking sheets with parchment paper.
- On a floured surface, roll the dough out to ⅛-inch-thick (3 mm) and with a 2-inch (5-cm) round cutter, cut out as many circles of dough as you can. You can gather and reroll any scraps. Place the cookies 1½ inches (3 cm) apart on the prepared baking sheets.
- Bake for 15 to 18 minutes, until the cookies look dry and baked. Transfer to a wire rack to cool completely and set the parchment-lined baking sheets aside.
- In a double boiler or in a microwave-safe bowl, combine the chocolate, peppermint extract, vanilla extract, and vegetable oil and heat gently, stirring frequently, until melted.
- Using a fork, immerse each cookie in the chocolate, then lift out and return to the baking sheets to set completely before serving and storing. (you can also pop them into the fridge). Store in an airtight container at room temperature for up to 3 days.