
 Recipe")
This Honeycomb Ice Cream is a dreamy, no-machine treat that combines creamy indulgence with a delightful crunch. In just 40 minutes, you’ll create a dessert that’s rich, velvety, and studded with golden honeycomb pieces for a perfect textural contrast. The smooth vanilla base melts on your tongue, while the honeycomb adds a sweet, caramelized bite that’s utterly irresistible.
What makes this recipe special is its simplicity and the way it balances flavors and textures. The honeycomb’s light, airy crunch pairs beautifully with the ice cream’s cool, silky richness. Plus, it’s a no-churn recipe, so you can skip the fuss and still enjoy a dessert that feels gourmet. Perfect for impressing guests or treating yourself, this ice cream is a sweet escape in every spoonful.
Ingredients for Honeycomb Ice Cream (No Machine)
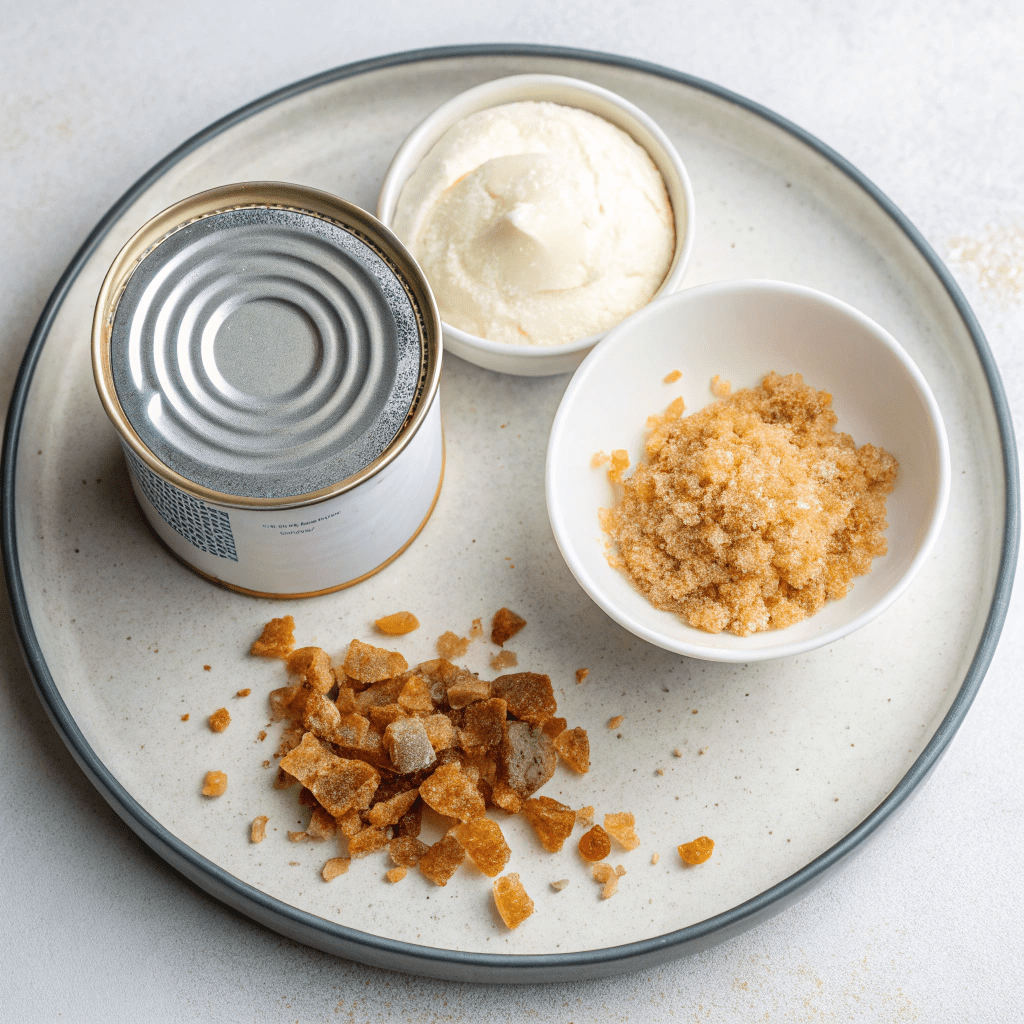
- 14 ounces (1 can / 400ml) sweetened condensed milk (cold, fat-free or regular)
- 2 cups (16oz / 450ml) whipping cream (cold)
- 2 cups crushed honeycomb candy (adjust to taste)
- Optional: 1 teaspoon vanilla extract (for added flavor)
Step-by-Step Instructions
- Chill the condensed milk: Place the sweetened condensed milk in the fridge to keep it cold while preparing the other ingredients.
- Whip the cream: In a stand mixer fitted with the whisk attachment (or using a hand mixer), beat the cold whipping cream on medium speed until stiff peaks form.
- Combine with condensed milk: Reduce the mixer speed slightly and slowly pour the cold condensed milk into the whipped cream. (Add vanilla extract now if desired.)
- Whip until thick: Increase the mixer speed again and whip the mixture until it becomes thick and reaches stiff peaks.
- Fold in honeycomb: Gently mix the crushed honeycomb candy into the ice cream base until evenly distributed.
- Freeze: Transfer the mixture to a freezer-safe container, cover tightly, and freeze for 6 hours to overnight until firm.
Creative Serving Ideas
Elevate your Honeycomb Ice Cream by serving it in a crispy waffle cone or alongside warm brownies for a decadent dessert duo. For a fun twist, top with a drizzle of caramel sauce or sprinkle with extra crushed honeycomb for added crunch. It also pairs beautifully with fresh berries for a refreshing contrast.
Simple Storage Tips
Store your ice cream in an airtight container to prevent ice crystals from forming. For best results, place a piece of parchment paper directly on the surface of the ice cream before sealing. This keeps it creamy and scoopable for up to 2 weeks in the freezer.
Easy Recipe Variations
Switch up the flavor by substituting the honeycomb with chocolate chunks, crushed cookies, or toasted nuts. For a chocolatey twist, mix in 1/4 cup of cocoa powder with the sweetened condensed milk before combining it with the whipped cream. You can even add a splash of liqueur like Baileys or Kahlúa for an adult-friendly version.
No-Machine Equipment Tips
If you don’t have a stand mixer, a hand mixer works just as well for whipping the cream. Use a large, chilled metal bowl to help the cream reach stiff peaks faster. When mixing in the honeycomb, a silicone spatula is your best friend—it folds everything evenly without deflating the mixture.
Frequently Asked Questions
Can I use regular milk instead of condensed milk? Unfortunately, no—the condensed milk is essential for sweetness and creaminess. What if I can’t find honeycomb candy? Try using crushed toffee or butterscotch chips as a substitute. How do I know when the cream is at stiff peaks? The cream should hold its shape when you lift the whisk, and the peaks won’t droop.

Honeycomb Ice Cream (No Machine)
Ingredients
- 14 ounces sweetened condensed milk (fat-free or regular) (cold) 1 Can/ 400ml
- 2 cups whipping cream (cold) 16oz/450 ml
- 2 cups crushed honeycomb candy
Instructions
- Place sweetened condensed milk in the fridge to keep cold
- Beat cold heavy cream on medium in a stand mixer fitted with the whisk attachment (or using a hand mixer) until stiff peaks form.
- Turn down the speed a little and pour the condensed milk into the whipped cream. (Stir in vanilla extract now if desired).
- Then, turn up the machine speed again and whip until your mixture is thick and at stiff peaks.
- Mix in the honeycomb into your ice cream base.
- Transfer your ice cream to container of your choice and freeze for 6 hours to overnight.

