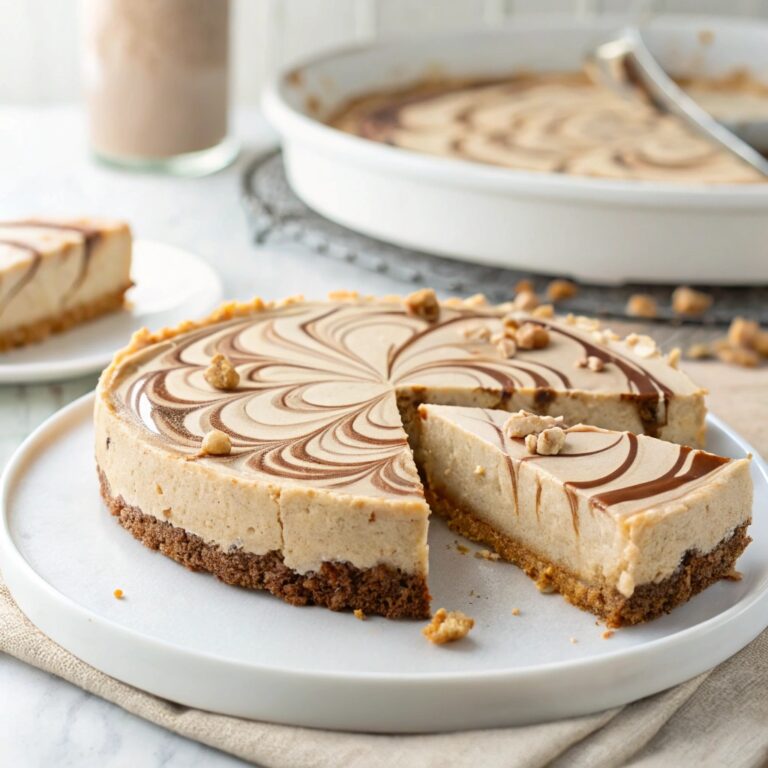
This No-Bake Peanut Butter Fudge Ice Cream Pie is a dreamy dessert that combines creamy, rich flavors with effortless preparation. In just 30 minutes, you’ll create a luscious treat featuring velvety peanut butter fudge, smooth ice cream, and a crunchy crust. The contrast of textures—silky, crumbly, and cool—makes every bite a delightful experience. Perfect for warm days or impromptu gatherings, it’s a crowd-pleaser that requires no oven time. The indulgent blend of sweet and nutty flavors will leave everyone reaching for seconds. Whether you’re a peanut butter lover or just need a quick dessert fix, this pie delivers satisfaction without the fuss. It’s the ultimate no-fail recipe for any occasion.
Ingredients for No-Bake Peanut Butter Fudge Ice Cream Pie

- For the Oreo Cookie Crust:
- ⅔ cup (5oz/142g) butter, melted
- 2 cups (6oz/170g) Oreo cookie crumbs (or substitute with graham cracker crumbs)
- For the Ice Cream Filling:
- 1 cup (8floz/225ml) heavy whipping cream (chilled for best results)
- ¾ cup (7½oz/213g) sweetened condensed milk, cold
- 1 teaspoon vanilla extract
- ⅓ cup (1½oz/43g) peanuts, roasted and salted (optional, for crunch)
- ⅓ cup (2½oz/71g) smooth peanut butter (or crunchy for added texture)
- For Serving:
- Homemade Hot Fudge Sauce (store-bought works too)
Step-by-Step Instructions
- Prepare the Oreo Cookie Crust:
- Butter and line a 9″ cake pan with 3 layers of cling wrap. This will make it easier to remove the pie later.
- In a medium bowl, mix the melted butter with the Oreo cookie crumbs until the mixture resembles wet sand.
- Transfer the crust mixture into the prepared pan. Press it firmly around the base and up the sides using your fingertips.
- Place the crust in the fridge to set for 30 minutes.
- Prepare the Peanut Ice Cream Filling:
- Using a stand mixer or electric hand mixer, whip the heavy cream on medium-high speed until soft peaks form.
- Pour in the sweetened condensed milk and vanilla extract. Continue whipping until the mixture is thick and reaches stiff peaks.
- Roughly chop the peanuts and gently fold them into the cream mixture, followed by the peanut butter.
- Assemble the Pie:
- Pour the peanut butter filling into the prepared crust. Smooth the surface with a spatula.
- Freeze the pie for a minimum of 5 hours, or until firm. It will keep in the freezer for up to 6 weeks.
- To Serve:
- Cut a generous slice and drizzle with Homemade Hot Fudge Sauce. Enjoy immediately!
Sauce and Topping Ideas to Elevate Your Pie
While the Homemade Hot Fudge Sauce is a classic pairing, why not mix it up? Drizzle with caramel sauce or chocolate ganache for extra decadence. For a crunchy twist, sprinkle crushed peanuts, mini chocolate chips, or even a handful of toffee bits on top. A dollop of whipped cream or a scoop of vanilla ice cream alongside your slice never hurts either!
Time-Saving Tips for Busy Bakers
Short on time? Use a pre-made Oreo pie crust instead of making your own. For the filling, you can substitute the whipped cream and condensed milk with store-bought peanut butter ice cream—just soften it slightly, mix in the peanuts, and spread it into the crust. Freeze as directed, and you’re good to go!
Storage and Serving Suggestions
This pie can stay in the freezer for up to 6 weeks, making it a great make-ahead dessert. When serving, let it sit at room temperature for 5-10 minutes to soften slightly for easier slicing. Pair it with a cup of coffee or a glass of cold milk for the ultimate treat.
Recipe Variations to Try
Not a fan of peanuts? Swap them for almonds or cashews for a different nutty flavor. You can also replace the peanut butter with almond butter or cookie butter for a unique twist. For a chocolatey version, add cocoa powder to the filling or mix in some chocolate chunks.
Equipment Guidance for Perfect Results
A stand mixer or electric hand mixer is essential for whipping the cream to stiff peaks. If you don’t have one, a whisk and some elbow grease will work—just be patient! A 9-inch cake pan is ideal for this recipe, but a pie dish will also do. Don’t forget the cling wrap to make removing the pie a breeze!

No-Bake Peanut Butter Fudge Ice Cream Pie
Ingredients
For the Oreo Cookie Crust:
- ⅔ cup butter, melted 5oz/142g
- 2 cups Oreo cookie crumbs 6oz/170g
For the Ice Cream Filling:
- 1 cup heavy whipping cream 8floz/225ml
- ¾ cup sweetened condensed milk, cold 7 ½oz/213g
- 1 teaspoon vanilla extract
- ⅓ cup peanuts, roasted and salted 1 ½oz/43g
- ⅓ cup smooth peanut butter 2 ½oz/71g
Instructions
- Prepare the Oreo Cookie Crust: Butter and line a 9″ cake pan with 3 layers of cling wrap. This will help you remove your pie later. Mix the melted butter with the Oreo cookie crumbs in a medium bowl until you’ve reached the texture of wet sand.
- Transfer the crust mixture into a 9 cake pan and press the cookies around the base and up the sides of the pan using your fingertips. Place in the fridge to set for 30 minutes.
- Prepare the Peanut Ice Cream Filling: Using a stand mixer or electric hand mixer, whip the cream on medium-high speed until soft peaks form.
- Pour in the condensed milk and vanilla into the whipped cream and continue whipping until your mixture is thick and to stiff peaks.
- Chop the peanuts roughly and stir into the cream mix followed by the peanut butter.
- Pour the peanut butter mix into the prepared pie crust. Smooth out the surface with a spatula. Freeze for a minimum of 5 hours. The pie will keep in the freezer for 6 weeks.
- To serve, cut a big slice and pour over the Homemade Hot Fudge Sauce.


