

Homemade Halloween ice cream doesn’t have to be spooky—just irresistibly delicious. With just 5 minutes of prep, you can whip up creamy, dreamy flavors that are perfect for the season. Think rich, velvety textures infused with bold, festive tastes like pumpkin spice, caramel apple, or decadent chocolate fudge. Each bite is a celebration of autumn’s coziest vibes, making it a treat everyone will adore. Whether you’re hosting a party or indulging solo, this quick recipe is your ticket to a sweet and memorable Halloween.
What makes this ice cream truly magical is how effortlessly it comes together. No churning, no waiting—just mix, freeze, and enjoy. The smooth, luscious consistency melts on your tongue, while the vibrant flavors dance with every spoonful. It’s the ultimate way to add a little spooktacular fun to your dessert lineup. Plus, it’s customizable, so you can create your own eerie or enchanting combinations. In just 5 minutes, you’ll have a dessert that’s as delightful as it is easy—perfect for making Halloween extra special.
Ingredients for Homemade Halloween Ice Cream
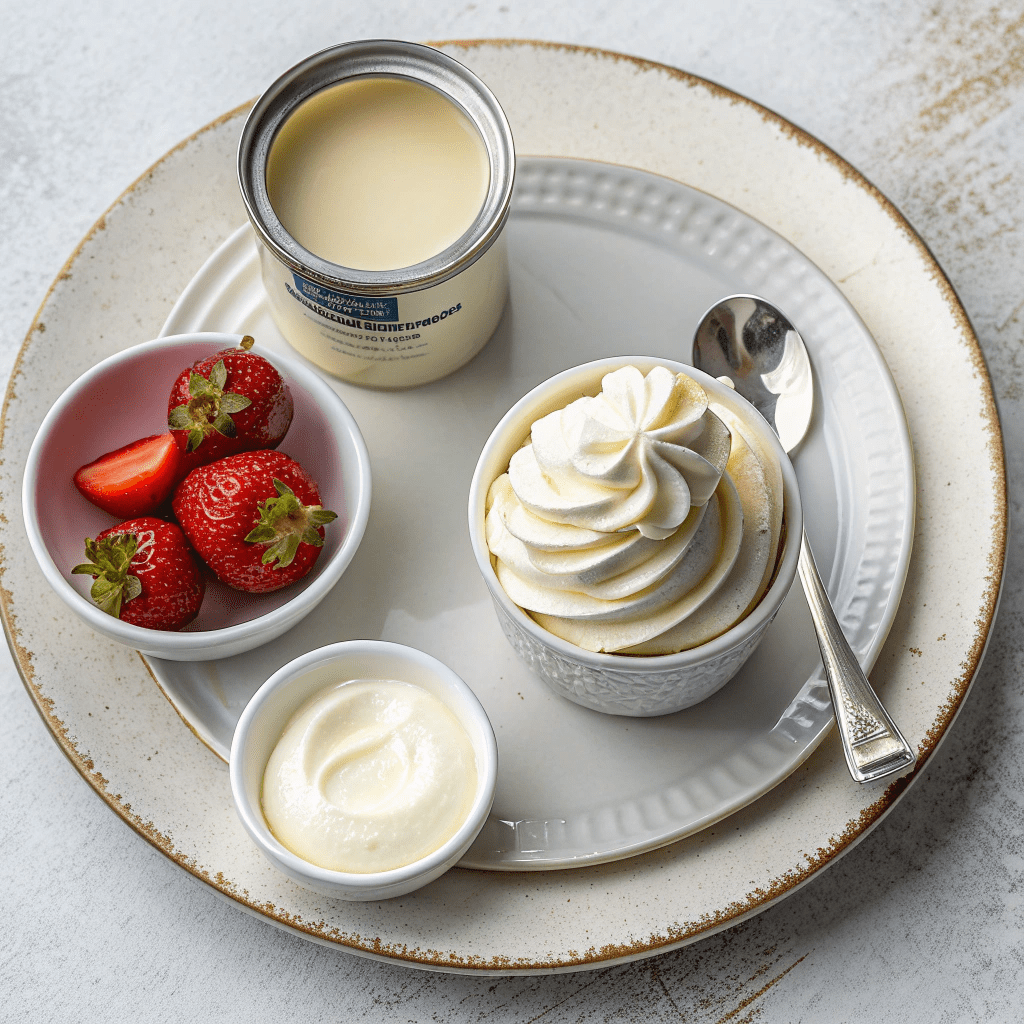
- 2 cups (16 oz/450 ml) cold whipping cream, all-purpose cream, or heavy cream (Use the right cream for your region: UK – whipping or heavy cream; Netherlands – Slagroom; Philippines – whipped or heavy cream)
- 14 ounces (1 can/400 ml) cold sweetened condensed milk (fat-free or regular)
- Optional: 1 teaspoon vanilla extract for added flavor
Step-by-Step Instructions
- Chill the Ingredients: Place the sweetened condensed milk in the fridge overnight to ensure it’s cold.
- Whip the Cream: Beat the cold heavy cream on medium speed in a stand mixer fitted with the whisk attachment (or using a hand mixer) until soft peaks form.
- Add Condensed Milk: Turn the mixer speed down slightly and slowly pour the condensed milk into the whipped cream. (If using vanilla extract, stir it in now.)
- Whisk to Stiff Peaks: Increase the speed to high and whisk until the mixture is thick and stiff peaks form. This is your ice cream base.
- Add Flavors: Once the base is thick, mix in your desired Halloween-inspired flavors or mix-ins. Get creative!
- Freeze: Transfer the mixture to a large resealable container and freeze for at least 6 hours or overnight before serving. Store for up to 6 weeks.
Spooky Flavor Ideas to Elevate Your Ice Cream
Get creative with your Halloween-themed ice cream! Try adding crushed Oreos and green food coloring for a “Frankenstein’s Monster” vibe, or mix in pumpkin puree and pumpkin pie spice for a seasonal treat. For a ghoulish twist, swirl in red raspberry sauce to mimic “blood” or add chocolate chips and a dash of orange extract for a “Chocolate Pumpkin” delight. The possibilities are endless—let your imagination run wild!
Perfect Pairings: Toppings and Sauces
Take your ice cream to the next level with fun toppings! Sprinkle candy corn, crushed graham crackers, or chocolate shavings for extra texture. Drizzle caramel sauce or hot fudge for a decadent touch. For a Halloween party, serve with gummy worms or eyeball-shaped candies to keep the spooky theme alive. Don’t forget whipped cream and a cherry on top!
Storage Tips for Freshness
Store your homemade ice cream in an airtight container to prevent freezer burn and keep it fresh for up to 6 weeks. If it hardens too much, let it sit at room temperature for 5-10 minutes before scooping. For portion control, consider freezing it in individual servings using small containers or silicone molds. This way, you can grab a treat whenever the craving strikes!
Time-Saving Hacks for Busy Bakers
To speed up the process, pre-measure your ingredients the night before and keep them chilled. If you’re short on time, skip the stand mixer and use a hand mixer—it works just as well! For quicker freezing, spread the ice cream mixture in a shallow pan before transferring it to a container. This reduces freezing time and ensures a creamy texture.
Equipment Tips for Smooth Scooping
Using a stand mixer with a whisk attachment is ideal for achieving stiff peaks, but a hand mixer works perfectly too. For easy scooping, invest in a spring-loaded ice cream scoop. If you’re feeling fancy, a silicone spatula helps scrape every last bit of the mixture into your container. Remember, the right tools make all the difference!

Homemade Halloween Ice Cream Flavors to Die for…
Equipment
- stand mixer or hand mixer
- whisk attachment
- large resealable container
Ingredients
- 2 cups cold whipping cream, all purpose cream, heavy cream Use the right cream for where you live: (UK, whipping cream or heavy cream) (Netherlands, Slagroom) (Philippines, whipped cream or heavy cream)
- 14 ounces cold sweetened condensed milk fat-free or regular
Instructions
- Place sweetened condensed milk in the fridge over night to keep cold.
- Beat cold heavy cream on medium in a stand mixer fitted with the whisk attachment (or using a hand mixer) until soft peaks form.
- Turn down the speed a little and pour the condensed milk into the whipped cream. (Stir in vanilla extract now if desired).
- Now, turn the speed back up high again and whisk until the mixture is thick and stiff peaks.
- Now you have your ice cream base you can add in your desired flavors and fixing once it is nice and thick. This recipe yields 3 pints (roughly 6 cups).
- GO NUTS! experiment with your flavors and enjoy creating something that is all you.
- Place in a large resealable container and freeze at least 6 hours or overnight before eating. Keep for up to 6 weeks.

