

These Easy Peanut Butter No Bake Cookies are a dream come true for anyone craving a sweet treat without the fuss. In just 15 minutes, you’ll have a batch of chewy, fudgy cookies packed with rich peanut butter flavor and a hint of chocolatey decadence. Perfect for busy days or last-minute cravings, they’re a no-oven wonder that delivers big on taste and texture.
Each bite offers a delightful contrast of creamy peanut butter and the satisfying crunch of oats, all held together by a luscious, melt-in-your-mouth glaze. Whether you’re sharing with friends or sneaking one for yourself, these cookies are a guaranteed crowd-pleaser. Quick, effortless, and utterly irresistible—they’re proof that the best things in life don’t require an oven.
What You’ll Need for Easy Peanut Butter No Bake Cookies
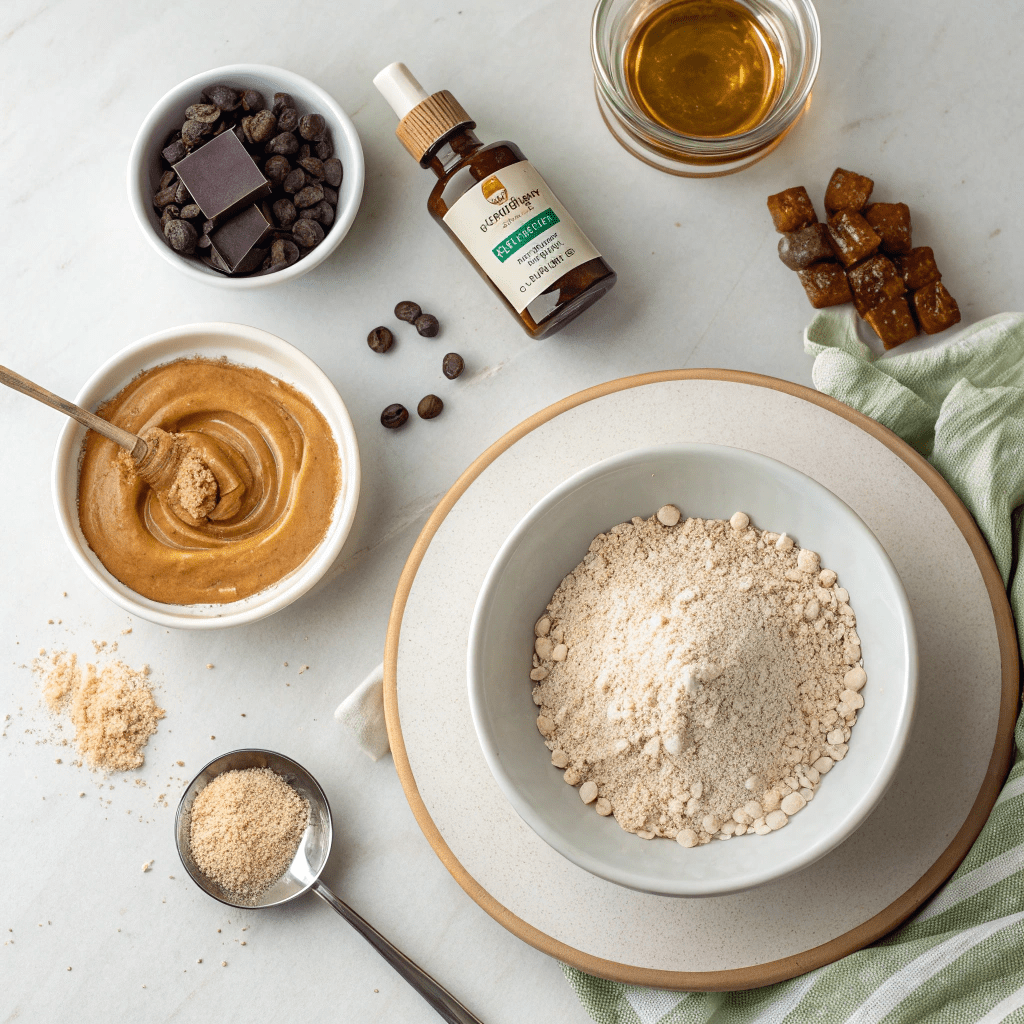
- 3 cups (9oz/255g) oat flour (or make your own by blending oats until fine)
- 1/2 teaspoon salt
- 3/4 cup (6oz/170g) peanut butter (creamy or crunchy, your choice!)
- 1 teaspoon vanilla extract
- 1/2 cup (5oz/142g) honey (substitute with maple syrup if preferred)
- 3/4 cup (4 1/2oz/128g) chocolate, melted (use dark, milk, or semi-sweet chocolate)
How to Make Easy Peanut Butter No Bake Cookies
- Prepare your workspace: Line a cookie sheet with parchment paper and set aside.
- Melt the base: In a large microwave-safe bowl, melt the peanut butter and honey together in the microwave for about 1 minute. Stir in the vanilla extract until smooth.
- Mix the dough: Add the oat flour and salt to the peanut butter mixture. Stir until a sticky dough forms. If the dough is too wet, add more oat flour; if too dry, add a bit more honey.
- Shape the cookies: Scoop 2 tablespoons of dough, roll into a ball, and flatten into a disc about 1/2 inch thick. Place on the prepared cookie sheet.
- Add the signature touch: Use a fork to press a crosshatch pattern onto the top of each cookie.
- Chill the cookies: Place the cookies in the fridge for 10-20 minutes to set.
- Melt the chocolate: In a medium microwave-safe bowl, melt the chocolate in 30-second increments, stirring until smooth (about 1 1/2 to 2 minutes total).
- Dip and set: Dip half of each cookie into the melted chocolate, then return to the cookie sheet. Let the chocolate set completely before enjoying.
- Store: Keep the cookies covered in the fridge for up to 10 days.
Creative Toppings and Dips to Elevate Your Cookies
While the classic chocolate dip is delicious, try experimenting with other toppings for a fun twist. Drizzle melted white chocolate or caramel over the cookies for a sweet contrast. For a crunchy texture, sprinkle crushed nuts, shredded coconut, or even a pinch of sea salt on the chocolate before it sets. Feeling adventurous? Dip the cookies in melted dark chocolate and roll the edges in mini chocolate chips or sprinkles for a festive touch.
Perfect Pairings: Serving Suggestions
These no-bake cookies are a great snack on their own, but they also pair wonderfully with a glass of cold milk, a cup of coffee, or even a scoop of vanilla ice cream. For a dessert platter, arrange them alongside fresh fruit like sliced bananas or strawberries. They’re also a fantastic addition to lunchboxes or as a quick energy boost during a busy day.
Storing and Keeping Your Cookies Fresh
To maintain their texture and flavor, store these cookies in an airtight container in the fridge for up to 10 days. If you’d like to keep them longer, they can be frozen for up to 2 months. Simply place them in a single layer on a baking sheet to freeze, then transfer to a freezer-safe bag. Thaw in the fridge before enjoying—no reheating needed!
Quick Swaps and Recipe Variations
Customize these cookies to suit your taste or dietary needs. Swap peanut butter for almond or sunflower seed butter for a nut-free option. Use maple syrup instead of honey for a vegan-friendly version. For a gluten-free twist, ensure your oat flour is certified gluten-free. You can also add mix-ins like chia seeds, dried fruit, or a dash of cinnamon for extra flavor and texture.
Time-Saving Tips for Busy Bakers
To streamline the process, prepare the dough in advance and store it in the fridge for up to 2 days. When ready, simply shape and dip the cookies. If you’re short on time, skip the chocolate dip and enjoy them as simple peanut butter oat bites. Using a cookie scoop ensures uniform sizes and speeds up the shaping process, making this recipe even quicker to assemble.

Easy Peanut Butter No Bake Cookies
Ingredients
- 3 cups oat flour
- 1/2 teaspoon salt
- 3/4 cup peanut butter
- 1 teaspoon vanilla extract
- 1/2 cup honey
- 3/4 cup chocolate, melted
Instructions
- Line a cookie sheet with parchment paper, set aside.
- In a large microwave-safe bowl melt together the peanut butter and honey, this should take roughly 1 minute.
- Add the vanilla and whisk until evenly combined and smooth.
- Next add the oat flour and salt and mix until a sticky dough is formed. (If your dough is too wet or dry add in more oat flour or more honey until you get stoppable dough)
- Using a cookie scoop or a tablespoon measure scoop 2 tablespoons of the dough into your hand and roll into a ball.
- Gently press the ball of dough between your palms to form a flat disc about 1/2 inch thick.
- Place the cookie onto the lined cookie sheet and repeat the process until all of the dough has been used.
- Using a fork press into the top of the cookie to form that classic peanut butter crosshatch pattern.
- Place in the fridge to set for 10-20 minutes while preparing the chocolate.
- In a medium microwave-safe bowl melt the chocolate in 30-second increments until fully melted, this should take 1 1/2 to 2 minutes.
- Once the cookies have set, dip 1/2 of each in the melted chocolate then return to the lined baking sheet to allow the chocolate to set.
- Once the chocolate has set enjoy!
- These can be kept covered and stored in the fridge for up to 10 days.

